Perfecting the look, texture, and lighting of Kenneth remains an ongoing project, but having reached a more acceptable state it's time to look at other elements of the project.
In order to have Kenneth, or any model, flush, I'll need the ability to change the colors in the given textures. I've started this process by downloading the Python Imaging Library (http://www.pythonware.com/products/pil/, http://www.pythonware.com/library/pil/handbook/introduction.htm), which allows me to read and write images.
Tuesday, October 25, 2011
Friday, October 21, 2011
Kenneth Bulks Up
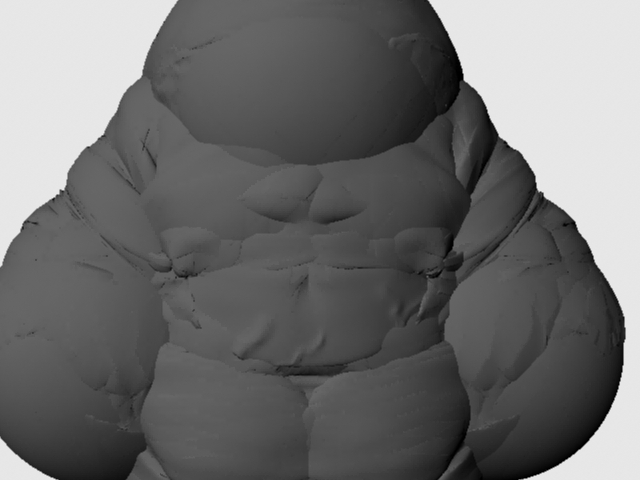
Getting Kenneth to look right has been quite a struggle. But got through some pretty good progress today. Shout out to Dan Knowlton for finding the Alpha Gain settings that allowed us to tweak the displacement and bump maps.
(Because I can't resist a good blooper. Displacement not quite working..)
 (Kenneth gets his muscles)

(Because I can't resist a good blooper. Displacement not quite working..)


Tuesday, October 18, 2011
Building a More Robust SSS Shader
Most beautiful explanation I've seen: http://www.lamrug.org/resources/skintips.html
I can't seem to get the specular map working.
I've found several forum posts of people having this problem, but there's never any reply.
SSS_fast_skin -> mia_material x


I can't seem to get the specular map working.
I've found several forum posts of people having this problem, but there's never any reply.
SSS_fast_skin -> mia_material x


(no specular) (overall specular 0.1)
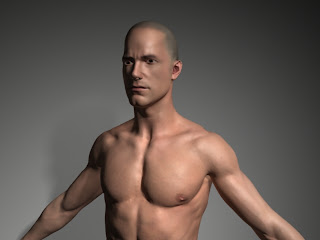
Got specular maps working by plugging them into the primary and secondary specular colors rather than the specular weights. Still not completely happy with it. The face especially looks rather plastic-y, but I believe that to be an issue with the bump map.

mia_material_x magic (on the right, mia_skin, on the left, mia_skin feeding into material x)

Sunday, October 16, 2011
New Model
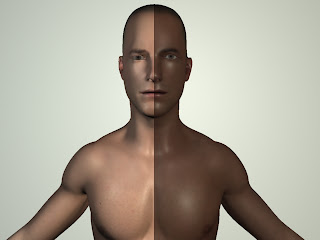
Working with on getting a new model put together. It came with more realistic textures than the previous model, but I have to put them together in Maya (originally built in LightWave)
Reference render:
 Current state:
 The bump maps aren't quite matching up in Maya.....
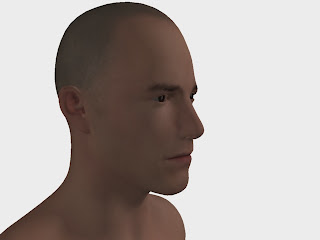
[Edit: 17 Oct, 10:00am]
Now I've added the displacement map..


Reference render:


[Edit: 17 Oct, 10:00am]
Now I've added the displacement map..


without Displacement with displacement
[Edit: 17 Oct, 7:00pm]
Yeah these look nice-ish, but it's not an SSS shader :(


Friday, October 14, 2011
System Diagram

This relies on creating a more realistic skin shader, as described the in the previous post, and on the procedural generation of the the flushing textures. From Joe's suggestion I'm looking into reaction-diffusion textures to generate a flushing texture with a given position and fall-off.
Monday, October 3, 2011
Sub Surface Scattering
Joe wants the model to have a more realistic shader with more depth. Similar to the webGL shader pictured below. Jellyfish follow a similar pattern in how they are shaded. Both are created with a subsurface scattering shader; it's built up of multiple layers: the epidermal (skin), subdermal (blood basically), and backscatter (that red glow you get if you hold your hand over a flashlight), are the main physically based components.

 The current model was built using Maya's misss_fast_skin, which has options for all of these. I also included a bump and specular map. Despite the fact that it was created using the SSS shader, it lacks the sense of depth that the above images show.


I tried following this jellyfish shading tutorial. But it did not provide the desired results.
Bonus:
I want to add a bonus section to my blog posts. I always end up finding something awesome, but not immediately applicable, as I search for answers. This will allow me to keep track of these links for when they will be helpful.
Subscribe to:
Comments (Atom)